
Rigid Splints
|
Rigid splints can come in many different shapes and sizes. These are just splints that are made from any hard or solid piece of material that can be attached to a limb that has been injured, usually a bone that has broken. You would need to use a rigid splint to immobilize the bone both directly after the injury to prevent further damage and also after the bone has been set to allow for the healing of the affected area. Most people don't think of is as such, but a cast is just an encompassing rigid splint. Splints can also be made from everyday items that are close by. These can range from hard pieces of plastic to a few strong tree branches lashed to the broken appendage.
|
|


How to apply a splint
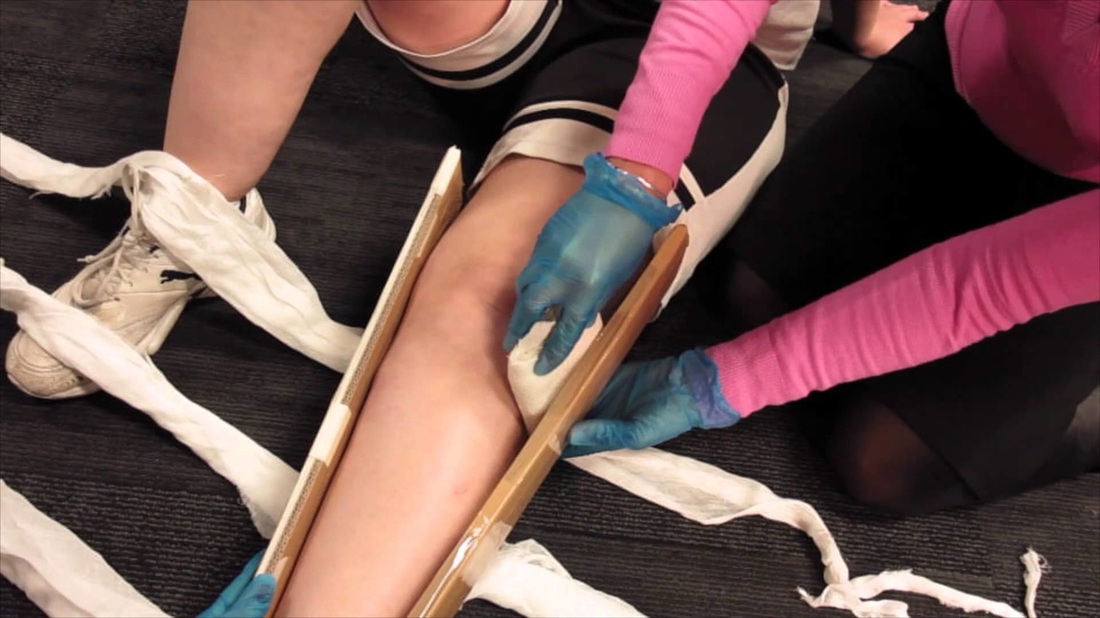
To apply a splint, follow these easy steps:
- Don't move the patient. Unless the patient is in immediate danger, do not move them to prevent any further injuries. You need to immobilize the injury as soon as possible.
- Assess the injury. Find out exactly where the fracture happened so you are able to properly place the splint.
- If possible, straighten the injury. This should be accomplished with the assistance of a trained medical professional when possible. Gently grasp the lower end of the injured limb and pull away from the fracture, guiding the extremity back to a neutral position.
- Gather your materials. In an emergency, it is always best to use a medical splint. However, if that is not readily available, it is possible to use items that are within reach. Materials like hard plastics, wood boards, stiff cardboard, and even strong tree limbs are suitable substitutes to immobilize the fracture. Find some cloth, rope, or even your belt to use to secure the splint to the injured area.
- When splinting, include the nearby joints. While trying to immobilize the area, it is important to immobilize the joints nearest the injury. This will prevent any further possible damage from the extremities bending or moving when they shouldn't. A good rule of thumb is to extend your splint at least 2-3 inches past the affected limb joint.
- Place/secure the splint. When putting the splint into place, you should set your splint on the left and right of a leg fracture and above and below an arm fracture. Then tightly, but not so tightly as to cut off circulation, wrap your securing materials around the injured limb and the splint itself. Also, when dealing with arm fractures, it is a good idea to use a sling and tie it close to the upper body, if possible.
- Check your work. Every hour or so, until medical assistance arrives, you should go back and check on your splint status. Make sure there is still circulation and feeling past the injury. If the patient complains about numbness or tightness at any point, you must go back, loosen the bandages holding the splint, and rewrap if necessary.
Below are some simple how-to videos that will further explain this procedure.
|
|
|
